Candy Cane Drawing

In this Candy Cane drawing lesson, you're about to have some festive fun. I’m Dawn, and I'm excited for you all because we’re gonna break down how you can draw and color this classic holiday treat with an extra twist, a beautiful ribbon tied around it. This lesson is crafted step-by-step so you won’t miss anything important along your creative journey.
We’ll kick things off by outlining our candy cane and adding that lovely ribbon that gives it an extra nice touch. You'll learn how each part, from those iconic stripes of red and white, right down through carefully placed shadows, comes together for that perfect candy cane look. I've made sure every part of this drawing process is easy and straightforward so that no matter your skill level, you’ll come out with a drawing you can be proud of.
By focusing on key aspects, such as shapes, patterns, and color application, you'll be well on your way. When we're done, you’ll not only have an impressive drawing but also sharpened skills that will boost your confidence for future art projects. So let’s bring that candy cane and ribbon together on paper!
Estimated Time: 40 minutes
Level: Beginner
Materials
- Blank Paper
- Pencil
- Crayons or Colored Pencils
- Ruler (optional but helpful)
Lesson: Candy Cane Drawing
In this candy cane drawing lesson, you'll follow along with just 12 clear steps that guide you through creating your very own holiday sweet treat. We'll focus on outlining, adding that beautiful ribbon, and some simple shading for added depth to your drawing. The combination of bright reds, greens, and soft tones will make your candy cane truly stand out. Let’s get started!
Outline the Candy Cane

Start by forming the hook-shaped outline of the candy cane.
Draw the Center of the Ribbon
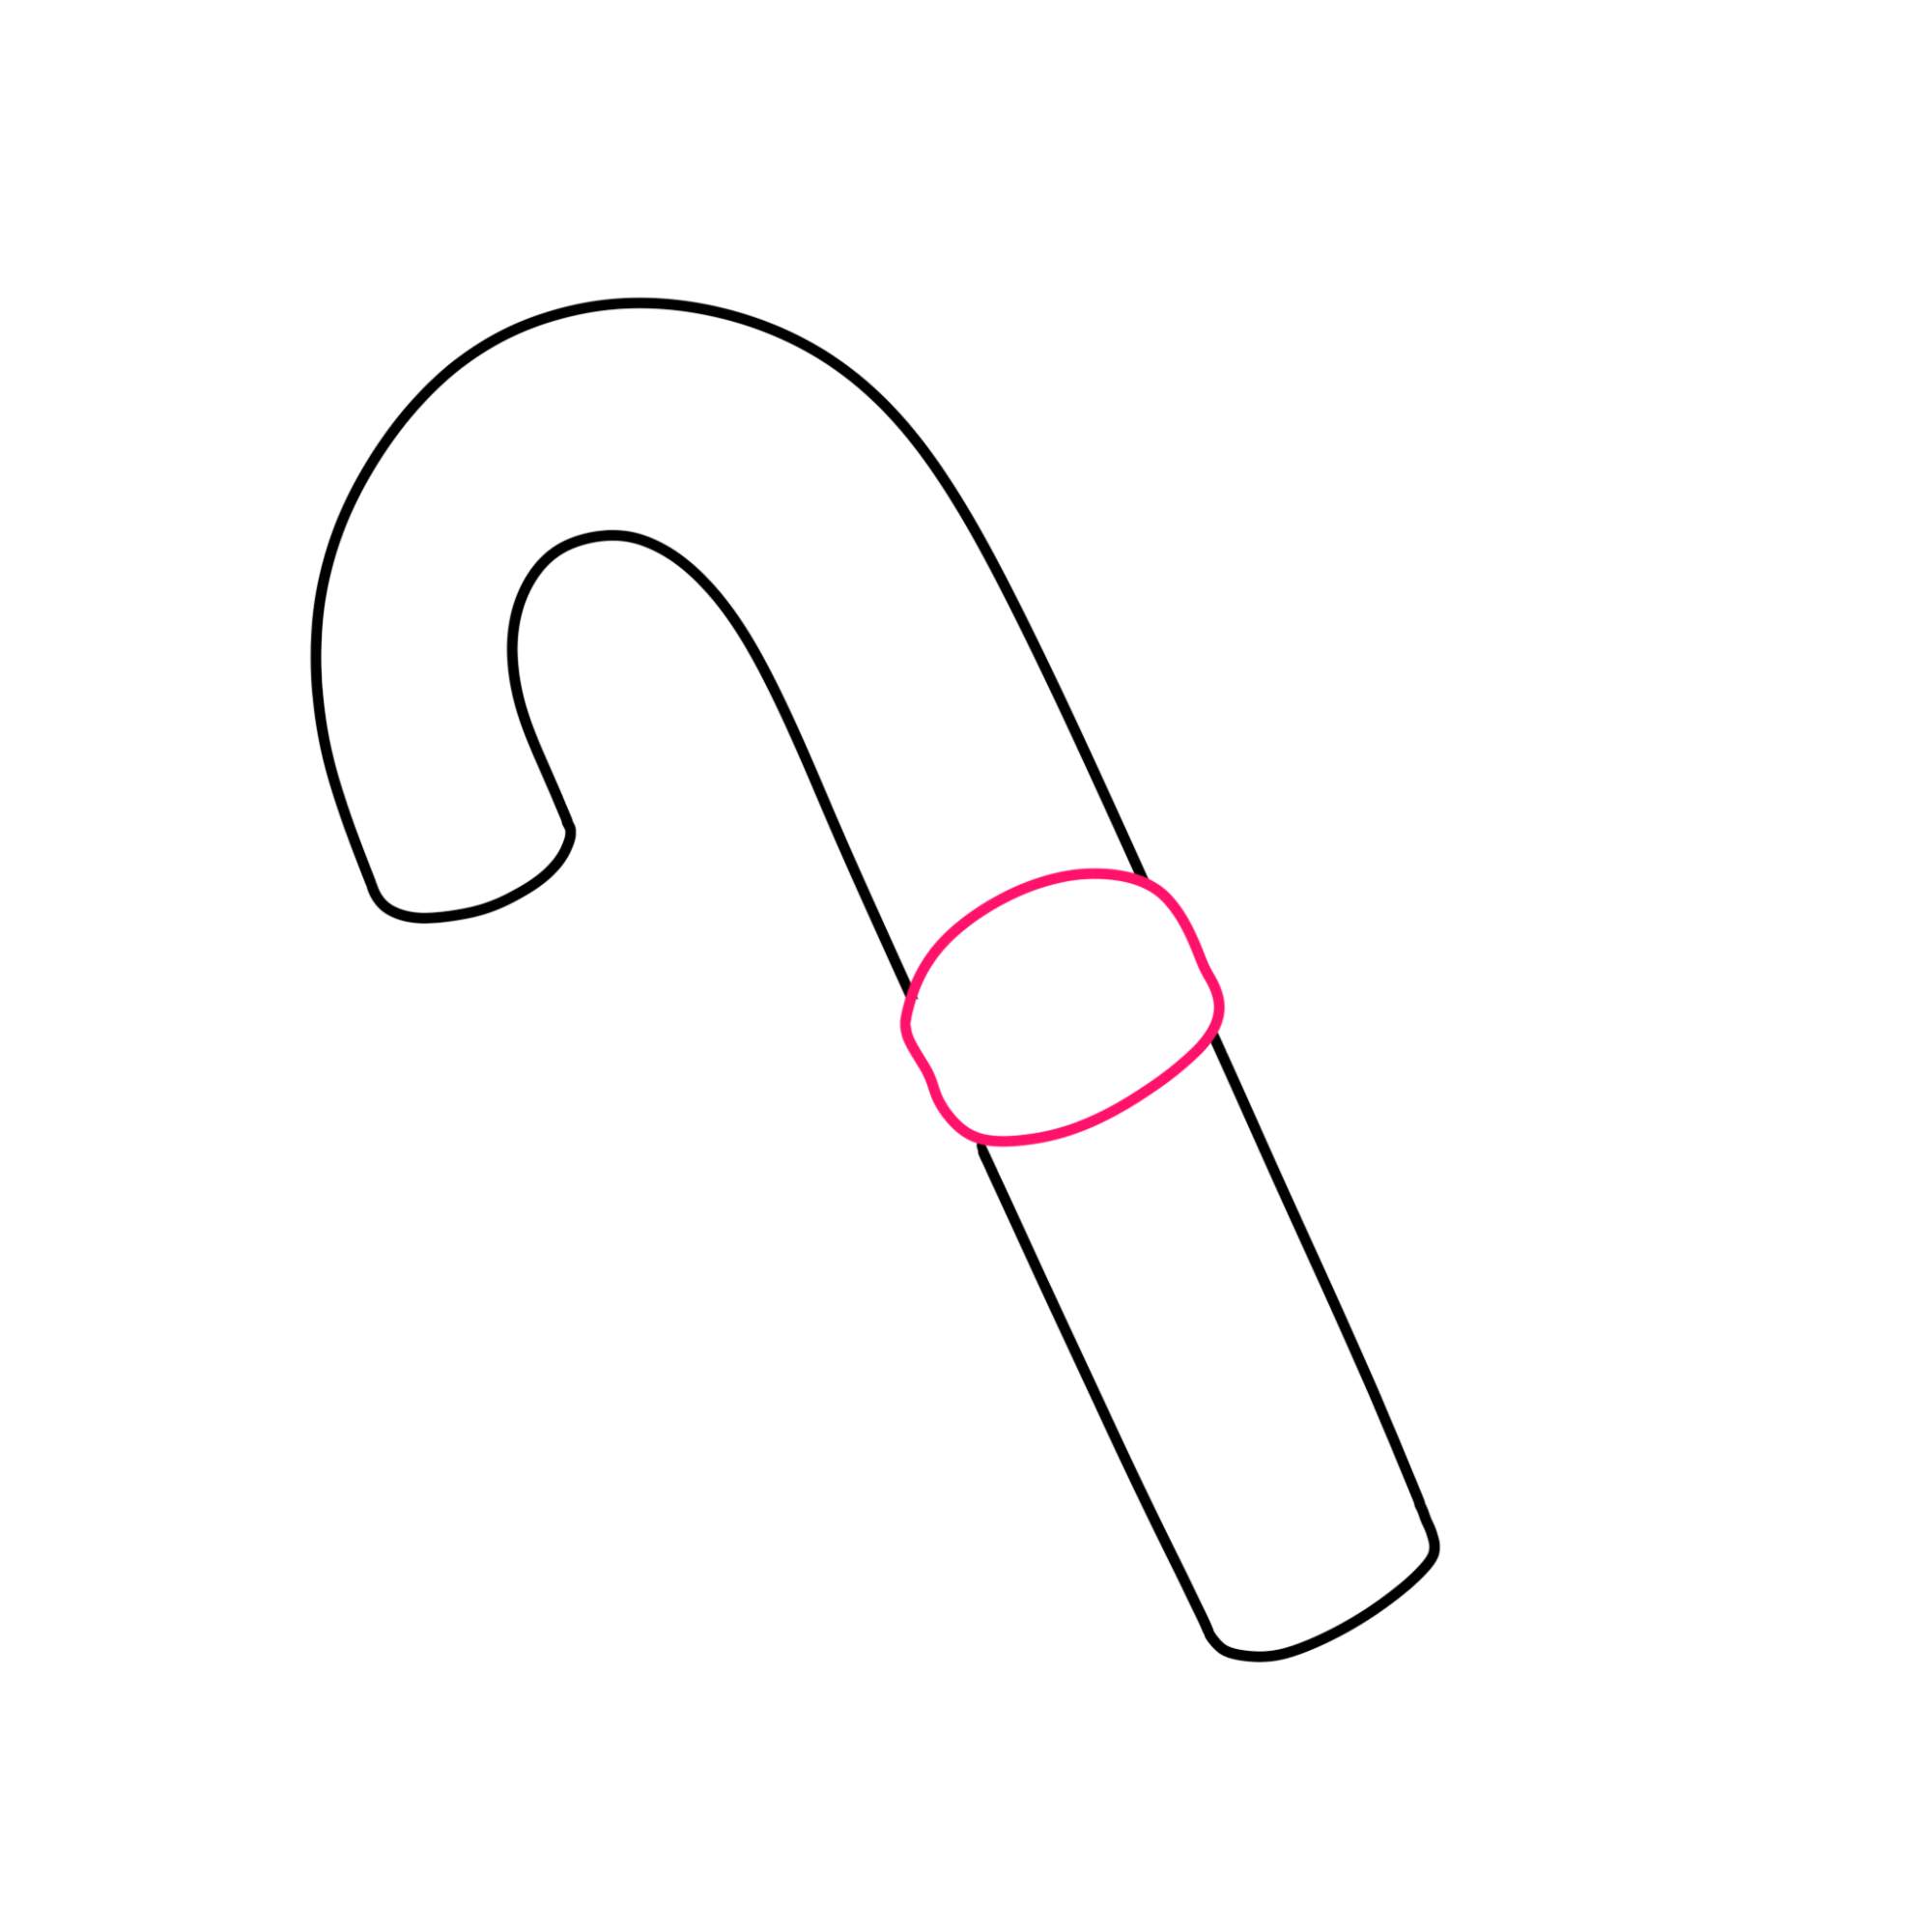
Let’s add a ribbon tied to the candy cane. First, create the center of the ribbon. Make sure to erase extra lines.
Add the Right Loop

Add the right loop of the ribbon by drawing a bumpy shape.
Form the Left Loop

Form the bumpy outline of the left loop of the ribbon similar to the previous step.
Outline the Creases

Draw short curved lines extending from the center of the ribbon to outline the creases of the loops.
Draw the Underside of the Ribbon

Draw the underside of the ribbon by making a curved line at the base of the loops as shown.
Form the Ends of the Ribbon

Form the pointy ends of the ribbon.
Add the Pattern of the Candy Cane
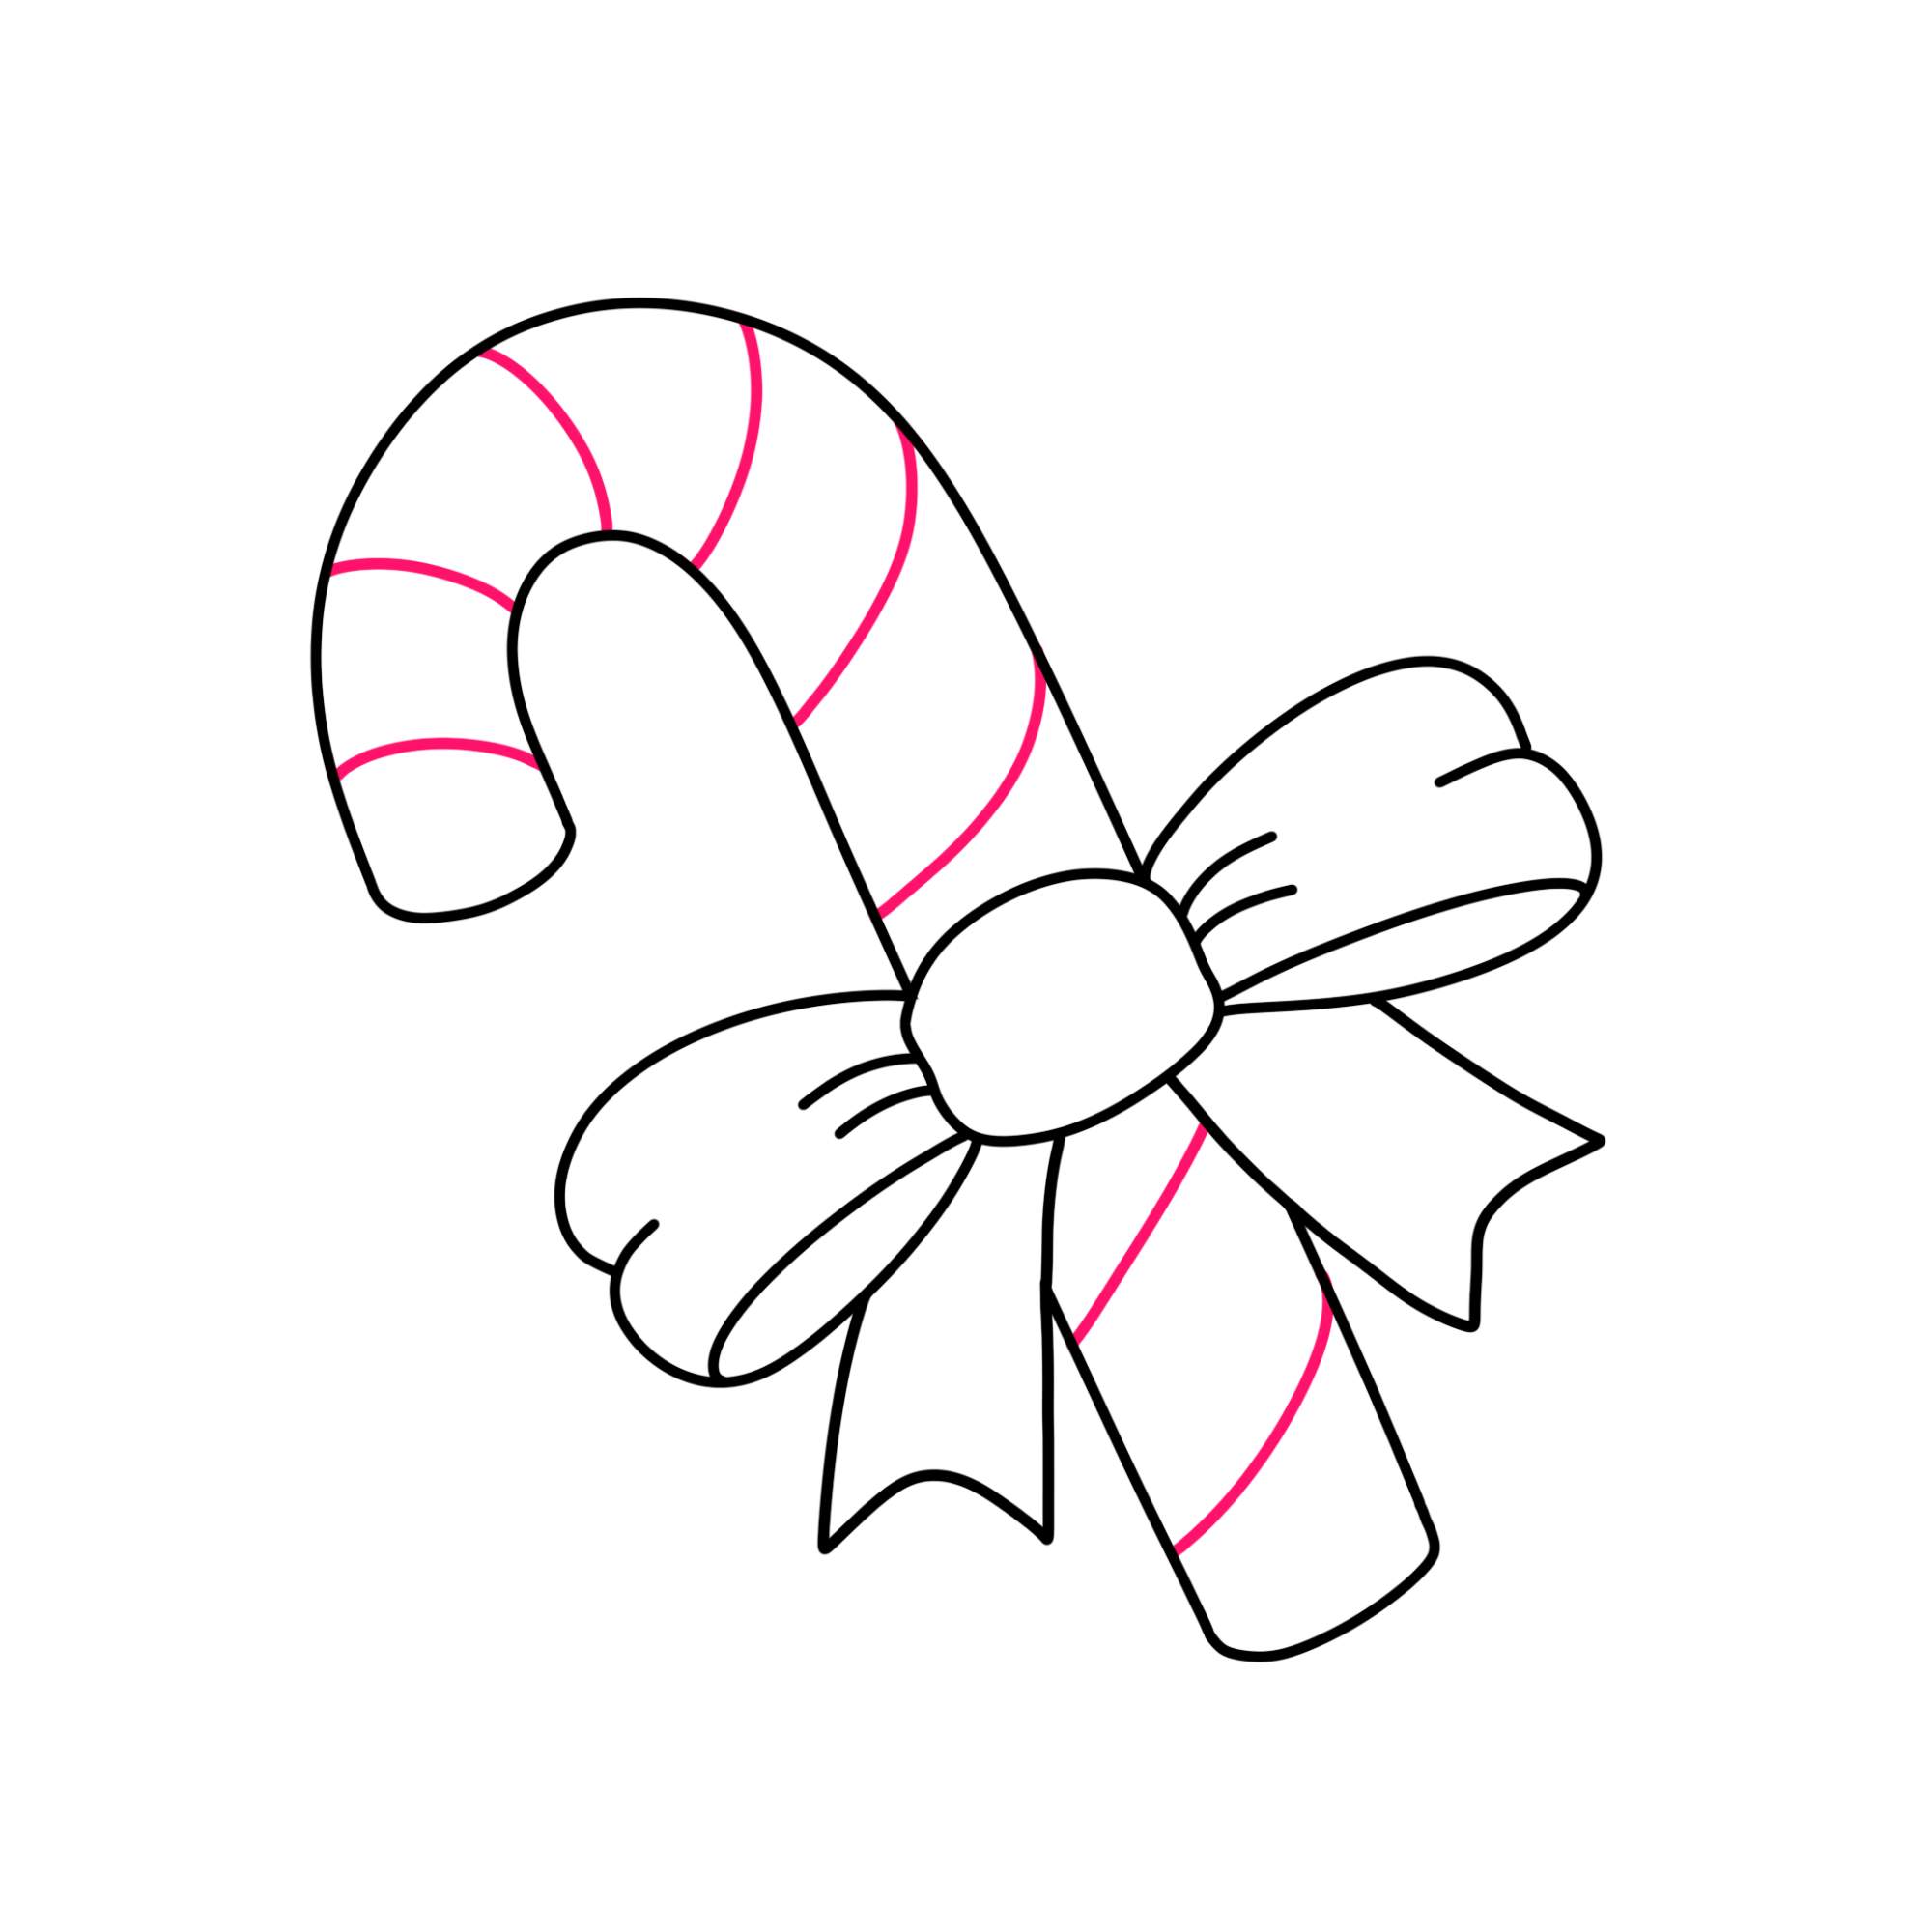
Add the striped pattern of the candy cane by creating evenly spaced diagonal lines that curve just a bit.
Fill in the Red Parts of the Cane

Fill in every other diagonal strip along the candy cane with a red color.
Color in the White Parts of the Cane
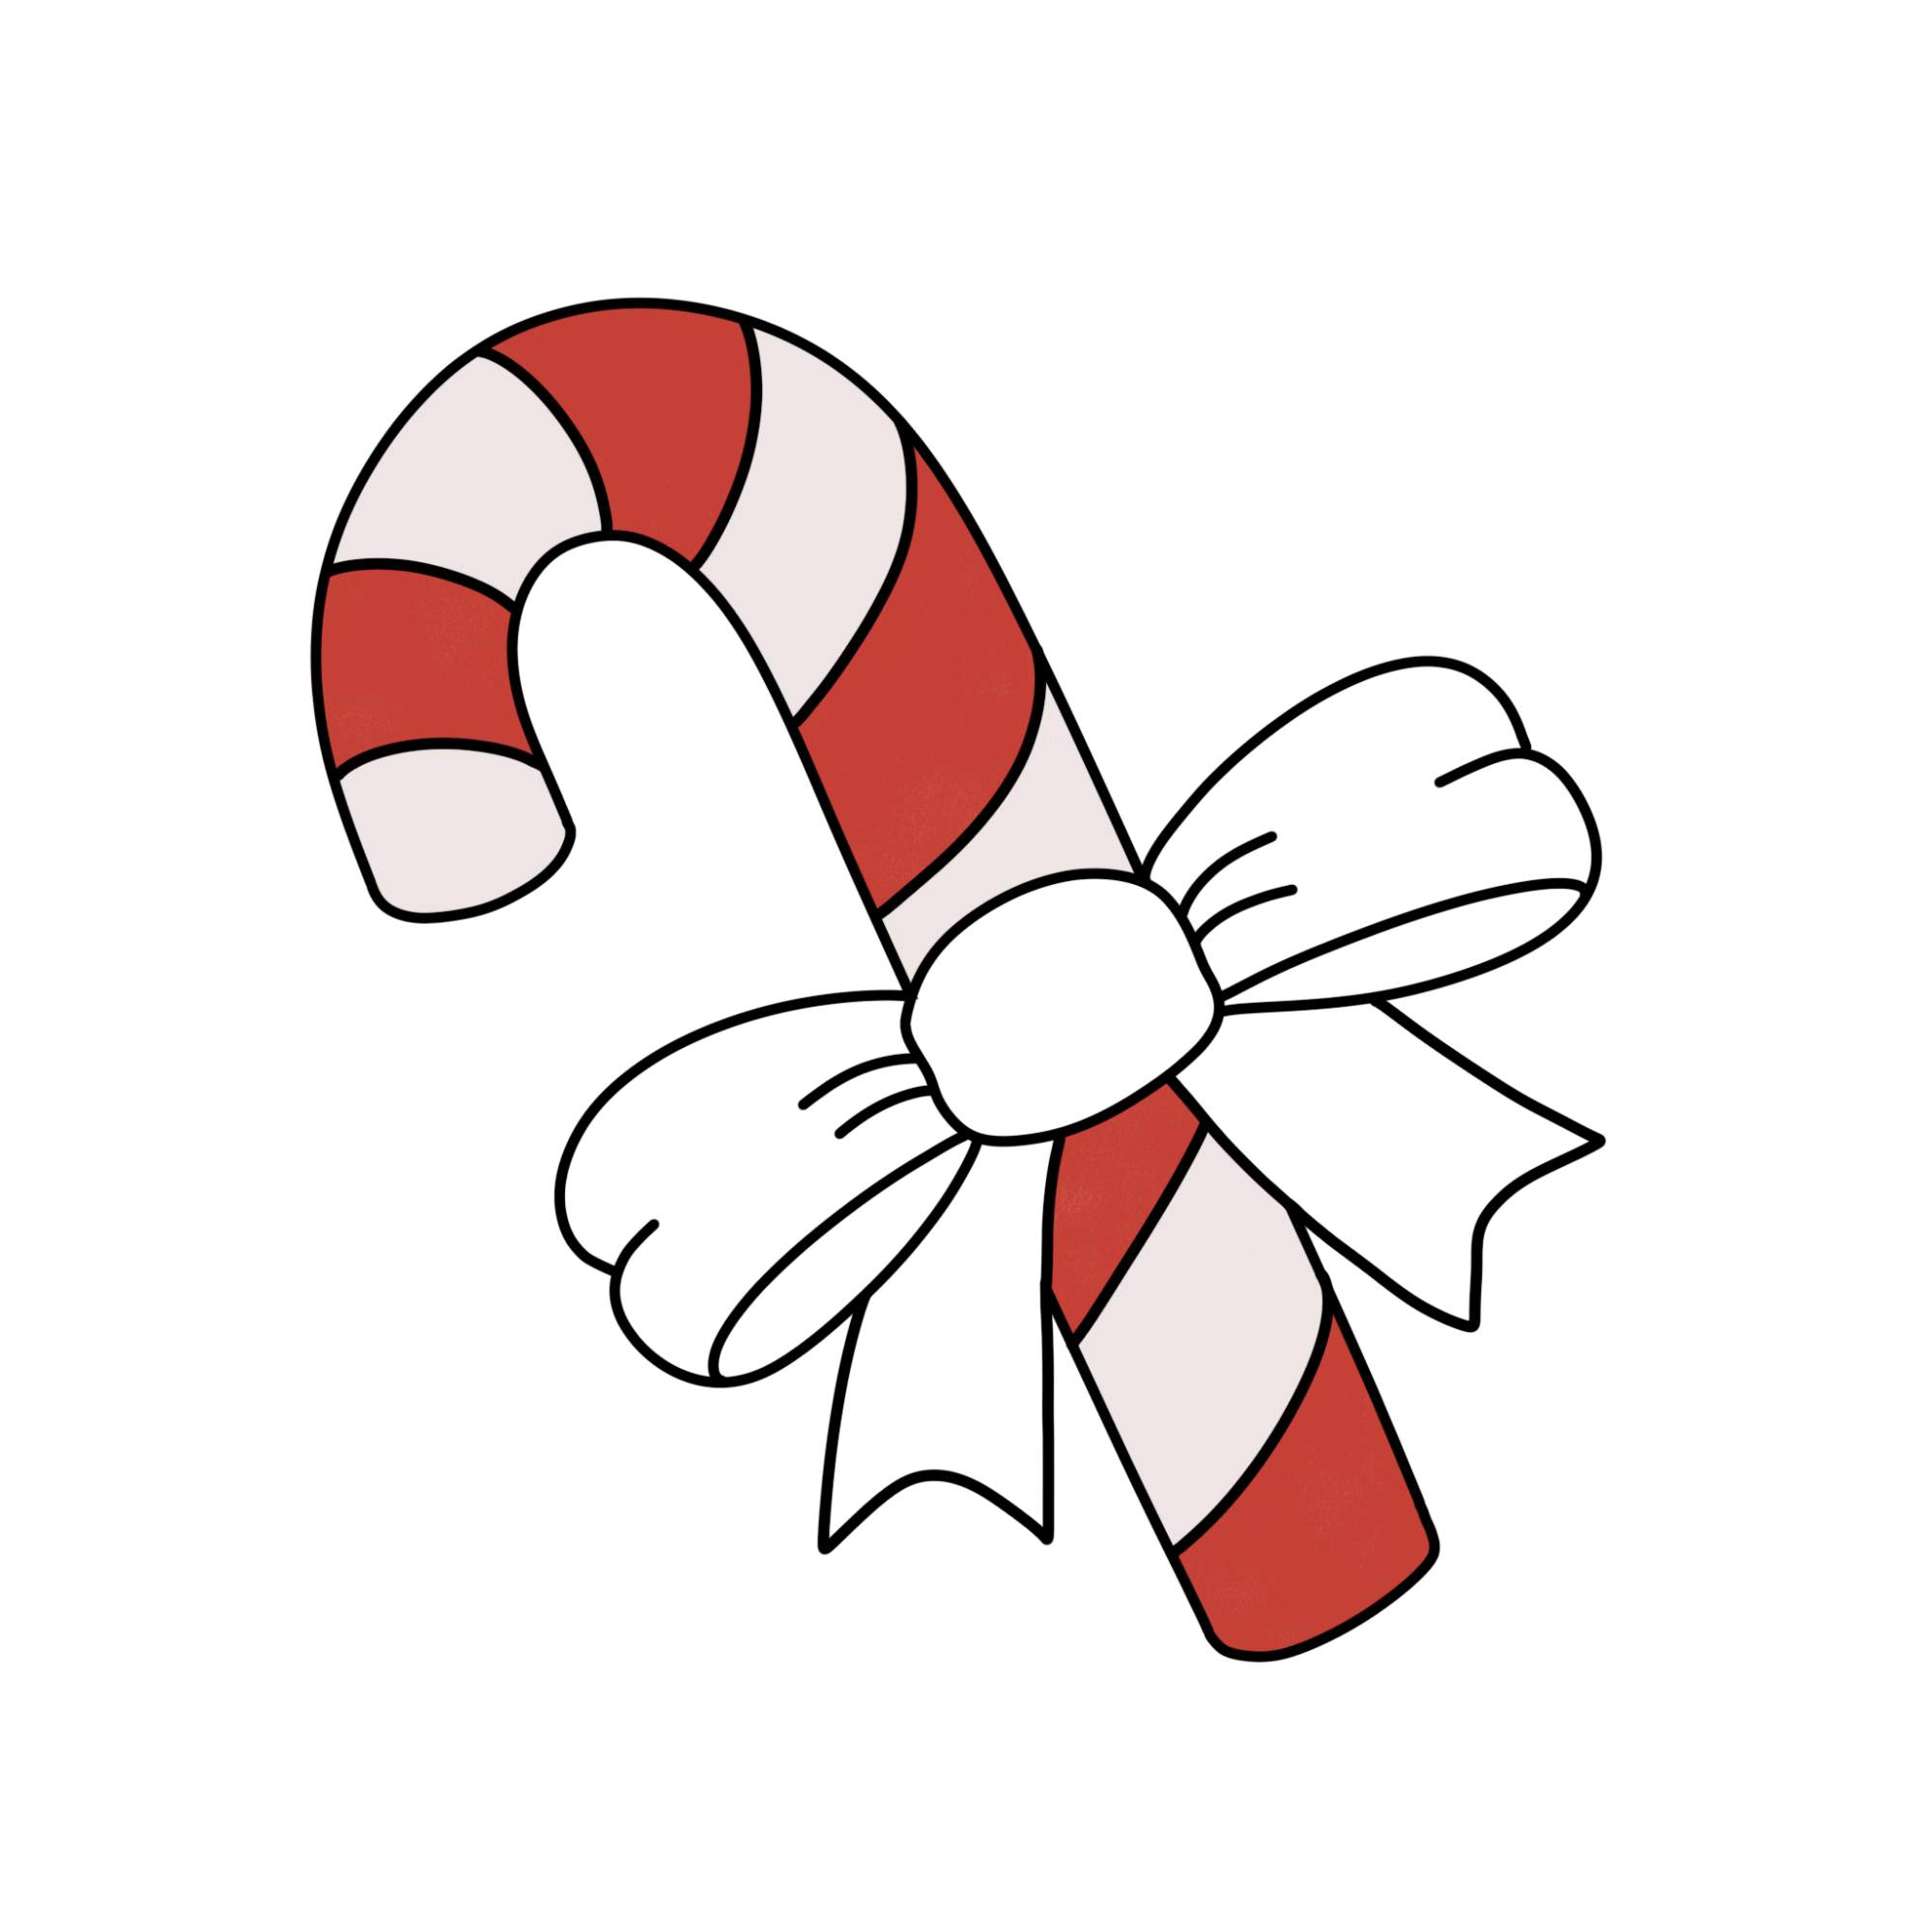
Use an off-white color to shade the rest of the uncolored strips of the candy cane.
Shade the Ribbon

Shade the ribbon with green. Then, use a dark green color to fill in the underside of the ribbon.
Add Shading to the Candy Cane

Add some shadows to the edges of the candy cane using a light gray color.

Artist & Educator